How to Build a Car Chassis from Scratch: The Engineer's Guide to Precision Fabrication
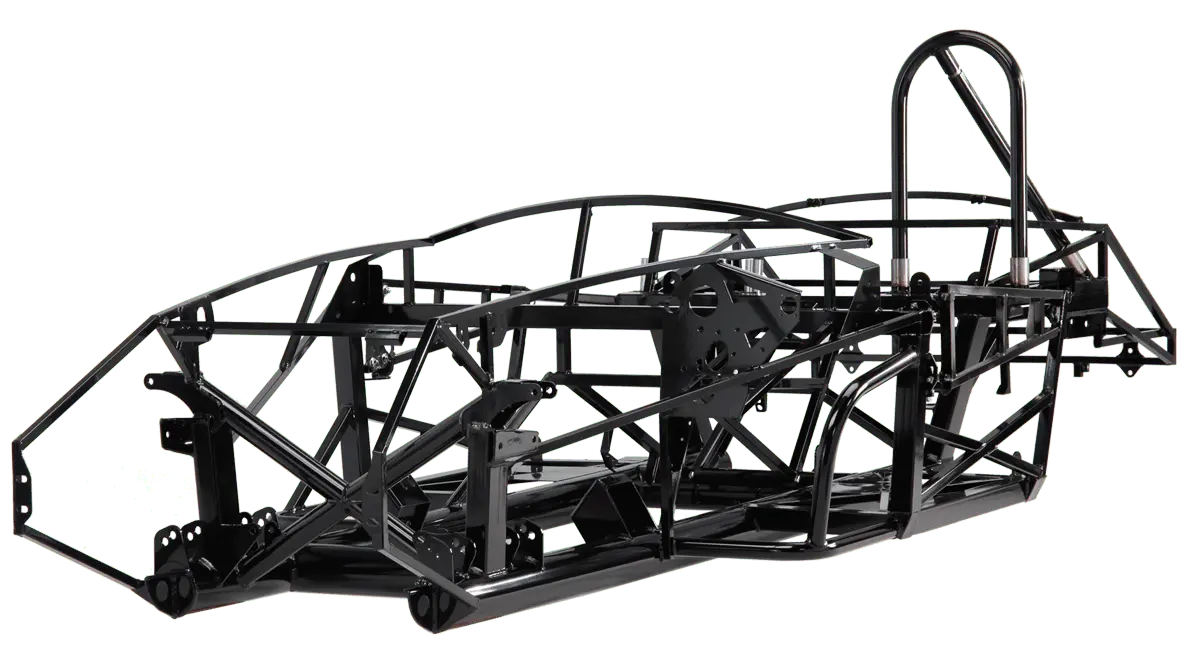
Building a car chassis from scratch is the ultimate engineering challenge. It is the skeleton that dictates a vehicle's handling dynamics, structural rigidity, and driver safety.
At Autoprototypes, we specialize in Rapid Prototyping and CNC Machining for the automotive industry. We have seen firsthand that the difference between a "garage build" and a "professional race chassis" often comes down to one factor: Precision.
If you are an engineer or a startup founder planning a custom chassis build, this guide outlines the professional workflow—from CAD simulation to the final weld—and highlights where CNC manufacturing is essential.
Phase 1: Geometry & Simulation (The "Digital Twin")
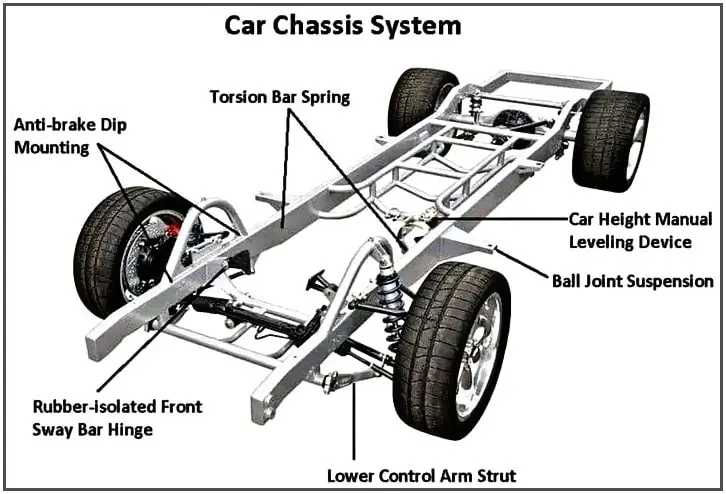
The chassis is merely a bracket that holds your suspension points in space. Before you purchase a single foot of tubing, your suspension geometry must be locked.
1. Hard Point Definition
You must define your kinematic points in CAD (e.g., SolidWorks or Fusion 360):
- Roll Center Stability: Minimizing movement during body roll.
- Ackermann & Bump Steer: Ensuring correct steering geometry throughout suspension travel.
- Anti-Dive / Anti-Squat: Managing weight transfer under braking and acceleration.
Rapid Prototyping Tip: Before finalizing the frame design, we recommend CNC machining aluminum prototype brackets to mock up your suspension points physically. This allows you to cycle the suspension and verify clearance before committing to a welded frame.
2. FEA Validation
Use Finite Element Analysis (FEA) to test for Torsional Rigidity. A flexible chassis acts as an undamped spring, making suspension tuning impossible. Aim for triangulation in every bay to direct loads through the tubes' centerlines.
Phase 2: Material Selection (Strength vs. Process)
Your choice of material dictates your welding process and safety margins.
Mild Steel (DOM - Drawn Over Mandrel)
- Properties: High ductility (bends before breaking), easy to MIG weld.
- Best For: Street prototypes, off-road trucks, and initial proof-of-concepts.
4130 Chromoly (Chrome-Moly)
- Properties: High strength-to-weight ratio. Ideal for motorsports.
- Critical Warning: 4130 requires TIG welding and proper post-weld stress relief (normalizing). If welded incorrectly without back-purging, the Heat Affected Zone (HAZ) becomes brittle and prone to cracking.
💡 Engineering Insight: For safety-critical components like roll cages, always use DOM or Chromoly. Never use ERW (Electric Resistance Welded) pipe, which has a seam that can split under impact.
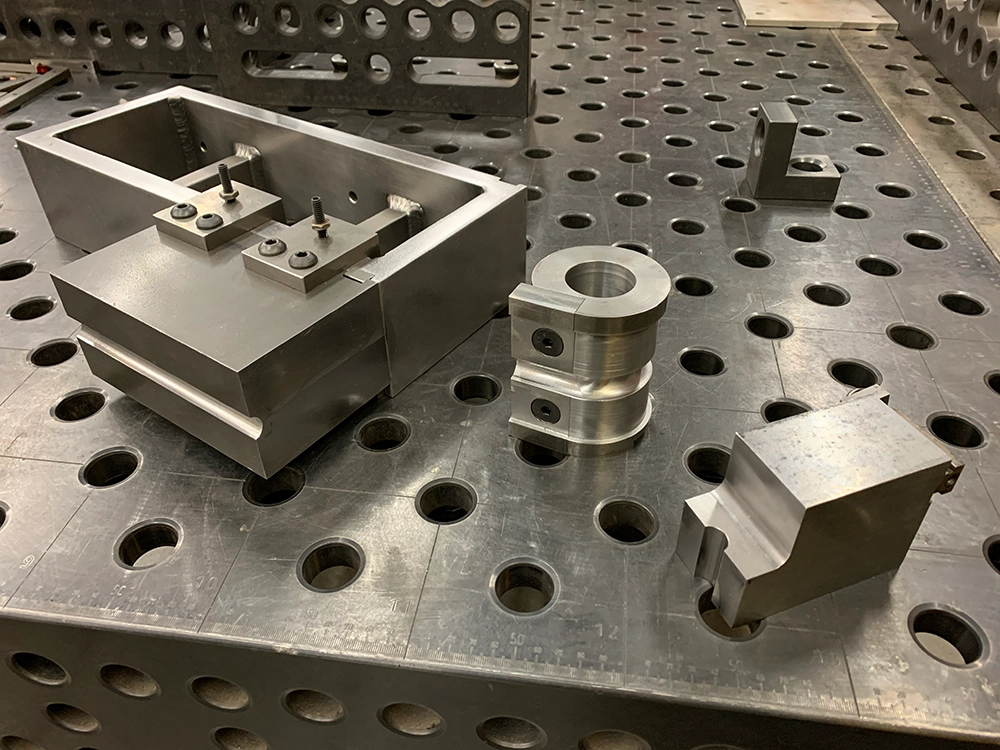
Phase 3: The Secret to Accuracy—CNC Fixturing
You cannot build a precision chassis on a concrete floor. To maintain tolerances of +/- 0.5mm across a 3-meter frame, you need a Jig Table.
However, manual measuring often leads to errors. The industry standard solution is CNC Machined Welding Fixtures.
- How it works: We machine custom blocks and jigs that bolt to your table. These jigs hold your suspension brackets in the exact 3D coordinates defined by your CAD model.
- The Result: When you tack weld, the tubes are held rigidly in place, preventing heat distortion from pulling your suspension points out of alignment.
Phase 4: Fabrication & Welding
1. Precision Notching
Tube intersections (nodes) must fit perfectly. A gap larger than 1mm requires excessive filler rod, which introduces more heat and distortion. Use a laser tube cutter or a precise hole saw notcher.
2. Welding Sequence
Never fully weld one corner of the chassis at a time. This will cause the frame to twist.
- Technique: "Jump" around the chassis to distribute heat evenly.
- Tack First: Fully tack the entire assembly and measure diagonals before laying final beads.
Phase 5: Why You Need CNC Machined Components
A tubular frame is only as strong as its connection points. This is where Autoprototypes's core expertise becomes vital to your project.
Fabricating complex mounts from sheet metal is outdated. Modern chassis rely on Billet Aluminum or CNC Machined Steel components for:
1. Suspension Uprights (Knuckles)
The upright connects the wheel to the car. It endures massive cornering and braking loads.
- Our Solution: We machine these from solid 7075-T6 Aluminum or 4140 Steel. CNC machining ensures perfect bearing bores (H7 tolerance) and optimized topology for weight reduction.
2. Engine & Transmission Mounts
Instead of welded tabs that can fatigue, use rigid billet mounts that integrate into the chassis structure.
3. Steering & Brake Mounting
Caliper mounting points must be perfectly parallel to the rotor. A CNC machined bracket guarantees this alignment, preventing uneven pad wear and spongy pedal feel.
Conclusion: Partner with a Manufacturing Expert
Building a chassis is a journey of engineering compromise. You trade weight for strength, and cost for precision.
While you may handle the tube fabrication in-house, don't compromise on the high-precision components.
At Autoprototypes, we support chassis builders and automotive startups by manufacturing:
- Custom CNC Welding Jigs & Fixtures.
- Billet Suspension Uprights & Hubs.
- Low-volume Subframe Assemblies.
Ready to build? Send us your CAD files for the critical machined parts, and let's ensure your chassis performs as well as it looks.
Get a Quote for CNC Chassis PartsDFM feedback provided within 24 hours.